Thursday, July 30, 2009

Prepared Mama: 72-hr Emergency Kits for Kids

2 comments
This week I finished assembling 72-hr emergency kits for my two children. I have to admit, their kits are pretty minimalist.
This is what I included:
• 3 day supply of food
• 3 water bottles
• Wash cloth
• Travel size toothpaste and toothbrush
• Wipes and diapers (Sweet Bee only)
• Complete change of clothing
• Emergency blanket
• Family phone numbers
• Coloring book, crayons
• Softie (a special snugly item for the Sweet Bee)

I just used backpacks that I already had around the house. The Ant Bug's bag has wheels. It's too heavy for her to carry on her back, but she can use the handle and pull it.

This is the first time I have actually packed kits for children, so I decided to ask my more experienced extended family members for their ideas. Below are some of their very helpful suggestions.

Eliza's General Tips: I put things into the backpacks (72-hour kits) that I would need for my children for three days. So we start with diapers and wipes and plastic bags for garbage, and then food and basic cleaning supplies. I also have some diaper pins and cloth diapers in case we run out of the disposable diapers. Last year I made a small comfort blanket for each child (piece of fleece with a ribbon sewed around the edge) that is also stored in the 72-hour kit. I made each one in their favorite color. I don't put some of the first aid things in their backpacks, but I do have some family items scattered among all the backpacks. So, for example, one child might have more food than the others since Kirk's bag has the water purifier in it.

Katie's General Tips: I don't have everything packed and ready yet, but Kyle has a much larger pack than the rest of us. I only packed clothes and food in Kayla's bag which we could be carrying in our hands anyway. The older kids have all the basics except first aid stuff. Kyle has all that plus things like t.p. and water filter and gas stove, mess kit, etc. I've also included little activities for the kids such as coloring books or other books and playing cards. I've had to update Kayla's bag every few months as she grows out of things. I do that when I rotate her other clothes into storage.

Tiffany on Clothing: The clothing idea that I like is to have sweat suits for each person. In time of emergency--if it is summer than you can cut off the sleeves and shorten the pants, or if it is cold then you have warmer clothing. This supposedly solves the problem of having to rotate the clothing seasonally. (If you live in the desert you may or may not want to use this idea!) Of course, for growing kids the only way to make it work size-wise is to stay on top of rotating clothing. Easier said than done! But, I guess you could buy clearance or second-hand sweat pants/shirts--one in each size all the way up the size chart and just devote them to the 72-hour-kit cause.

Becky on Transportation: We got a nice wagon to help carry the load- we also have a bike trailer that could be used to transport children and backpacks. Our neighborhood has emergency drills about twice a year and it has been interesting to actually strap the backpacks on everyone and see how they do for a short walk. Paul and I have backpacking packs so that we can carry most of the items- the children can't really carry that much so we just keep their packs pretty light.

Tiffany on Transportation: My latest answer to the question of "how can the kids haul their kits?" was to buy a few of the rolling backpacks. That would make it easy for adults as well as children.

Tiffany on Food: My latest idea is to get a large see-through plastic storage bin to put in my pantry. I will then stock it with all the food for the 72-hour-kits and date the items. Then--the food should be easily at hand and visible so I can rotate it more readily! So, if we have an emergency at home we'll have the food and be fine. If we have to leave in a car then it will be easy to grab the backpack kits and the food box. If we need to we can easily distribute it into the individual kits. So, this isn't something I've done--it just seems to be my latest idea of something that might work for me.

I think the key is to just start doing something. I don't feel that our kits are exactly perfect yet, but I can keep adjusting things as we go along. At least we're a lot better off then we were just a few months ago!

Helpful Resources
Prepared LDS Family: This site is amazing and very helpful! Read it, and you'll be inspired to do something to prepare your family!
If ye are prepared ye shall not fear: This thought-provoking site explores issues of preparedness for the coming hard times.
Team Freeman: Project Prepared Part 3: A real-life example of a 72-hr kit.
Ready.gov: Prepare. Plan. Stay Informed.

Monday, July 27, 2009

"Cultivate your gifts and interests."

0 comments
Elder Ballard asks (and answers) "What can you do, as a young mother, to reduce the pressure and enjoy your family more?"

Third, even as you try to cut out the extra commitments, sisters, find some time for yourself to cultivate your gifts and interests. Pick one or two things that you would like to learn or do that will enrich your life, and make time for them. Water cannot be drawn from an empty well, and if you are not setting aside a little time for what replenishes you, you will have less and less to give to others, even to your children. Avoid any kind of substance abuse, mistakenly thinking that it will help you accomplish more. And don’t allow yourself to be caught up in the time-wasting, mind-numbing things like television soap operas or surfing the Internet. Turn to the Lord in faith, and you will know what to do and how to do it.

M. Russell Ballard, “Daughters of God,” Ensign, May 2008, 108–10

Thursday, July 23, 2009

All Things Frozen Day 3: Frozen Snacks on a Stick

4 comments
Want to hear my secret weapon for dealing with summer heat? Add ICE!

Today's Activity: Frozen Snacks on a Stick, or in other words--Popsicles

My girls really like to eat frozen things. The Sweet Bee is really hit and miss when it comes to eating (or even trying) most foods, but if it's frozen I can almost guarantee that she will eat it. So we've been experimenting with a few different snacks on a stick.

Our standard favorite is Orange Yogurt Creamsicles.
Here is what you'll need:
Plain vanilla yogurt
Orange juice
Popsicle mold

That's it. I don't use exact measurements. I just start mixing yogurt and juice (I use a glass Pyrex 1 cup measuring cup) until I get the flavor I like. Use a whisk to mix it up. Pour into molds, freeze and enjoy.
We regularly eat this for a bedtime snack (hence the wet hair and lack of clothes--the Sweet Bee just had a bath).
I wrote about last year's Popsicle concoctions here.

Make and Takes recently had this great post: Treats to Keep the Kids Cool for Summer. We made our own watermelon popsicles and they were a winner at our house!

As you can tell, we had fun with a few different shapes.

Next we loaded grapes on a skewer. Amazing! My kids have been picky about grapes lately, but they'll eat them frozen! I think the skewer adds to the excitement.
All this talk of popsicles makes me want to start singing that Popsicle song from the 60's (no, I'm not that old--my parents just made sure I was thoroughly exposed to the music of that decade).

Popsicle ba-ma-ma-ma-ma ba-ma-ma-ma-ma
Popsicle ba-ma-ma-ma-ma
If you want to keep cool it does the trick
And it comes on a stick
Uh-huh-huh uh-huh-huh
Jan and Dean, Popsicle, 1966

Wednesday, July 22, 2009

All Things Frozen Day 2: Ice Treasures

0 comments
Want to hear my secret weapon for dealing with summer heat? Add ICE!

Today's Activity: Ice Treasures

Let's Explore shared a great activity for occupying children in the hot summer months--let them dig for buried ice treasures! Here is our take on this activity.

First, you'll need to bury the treasure. I used small plastic animals, but you could use anything you have around your home--buttons, sea shells, marbles, beads, etc.

Select your container (plastic food storage containers for us) and start freezing. Do it in layers, so your treasure gets dispersed throughout. Once it's ready to go, gather your excavating tools.

You can see from the picture above that we had a variety of tools. The most useful tool was the bowl of warm water, from which we filled medicine droppers and a water bottle. So in the end I guess we did a lot more "melting" than "digging" but it was still a fun activity.
My girls loved freeing the animals. The Ant Bug has been begging to do this activity again, so I think we have a winner here!

Tuesday, July 21, 2009

All Things Frozen Day 1: Ice Cream (in a bag or not)

0 comments
Want to hear my secret weapon for dealing with summer heat? Add ICE!

Today's Activity: Ice Cream in a Bag

I originally saw this idea in a Parents magazine. We love ice cream so we had to try it out.


Here's what you'll need:

Ice cubes
Ziploc bags-quart and gallon size
6 Tb. rock salt (more or less)
1 cup milk
2 Tb. sugar
1/2 tsp. vanilla
handful of chocolate chips

Fill a gallon-size plastic baggie halfway with ice. Add the rock salt. In a separate quart-size plastic bag combine the remaining ingredients. Seal the smaller baggie and put it inside the larger bag (seal that one too). Shake the bag for 10 minutes. Your hands will get cold and you might not last 10 minutes. But it is yummy even if it is a little slushy!

We combined this activity with a Family Home Evening lesson on Perseverance.

Just a few days after we did the activity I discovered this post on Make and Takes doing this same activity. Her recipe is slightly different, and she suggested wearing oven mitts while you're doing the shaking--helpful tip!

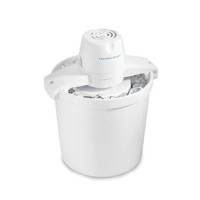
We also like to make homemade ice cream, not in a bag.Here is our favorite recipe, from the family cookbook.

Lemon Ice Cream
3/4 cup lemon juice
4 cups sugar
2 cups cream (1 pt.)
Milk to fill
1/2 tsp. lemon extract
Freeze. This takes a lot of salt to freeze. Makes 4 quarts.

We'll be making this on Friday to celebrate Pioneer Day (24th of July). I think this should become an annual tradition!

Monday, July 20, 2009

"Don't overschedule yourselves."

1 comments
Elder Ballard asks (and answers) "What can you do, as a young mother, to reduce the pressure and enjoy your family more?"

Second, don’t overschedule yourselves or your children. We live in a world that is filled with options. If we are not careful, we will find every minute jammed with social events, classes, exercise time, book clubs, scrapbooking, Church callings, music, sports, the Internet, and our favorite TV shows. One mother told me of a time that her children had 29 scheduled commitments every week: music lessons, Scouts, dance, Little League, day camps, soccer, art, and so forth. She felt like a taxi driver. Finally, she called a family meeting and announced, “Something has to go; we have no time to ourselves and no time for each other.” Families need unstructured time when relationships can deepen and real parenting can take place. Take time to listen, to laugh, and to play together.

M. Russell Ballard, “Daughters of God,” Ensign, May 2008, 108–10

Thursday, July 16, 2009

Prepared Mama: Personal Supplies for a 72-hr Kit

1 comments
Next up on my Preparedness Project List was to make sure all of our personal supplies were up to date. Luckily most of these supplies were already gathered from my last push for preparedness a few years ago so I didn't have to do too much this round.
This is what I included in my kit:

A list of items in kit

Personal Hygiene Items

• Bar of soap, wash cloth, hand towel
• Travel size deodorant
• Hair elastics
• Travel size toothpaste and toothbrush
• Kleenex
• Insect repellent
• Cotton balls, Q-tips
• Toilet paper, wet wipes, hand sanitizer
• Feminine supplies
• Complete change of clothing (not shoes)

Tools, First Aid, Etc.
• Flashlight w/ batteries, matches, lighter, candle
• Emergency blanket
• Paper and pen
• 1 Garbage bag
• Mini First aid kit
• Rain poncho
• Whistle
• Family phone numbers
• Book of Mormon, small ball, deck of cards
• $41 cash

My husband's kit includes the same items, customized for a man. To keep things organized I packed like items in smaller Ziploc bags.

I realize this list of supplies is a little on the lean side. But I'm starting with the basics! Prepared LDS Family has a great list of supplies to include that is a little more thorough. Definitely go read her list.

Here are the loaded backpacks for myself and my husband. (Guess which is which!)
I picked up the backpacks on clearance a few years ago after the back to school rush, so now might be a good time to be working on this project. These backpacks also include our 3-day supply of food I described in detail here.

My next Preparedness Project will be to finish packing kits for my two children. I've been surveying experienced family members on tips for packing kits for young children, but I'll leave that for another post.

I'm beginning to feel like I've only just skimmed the surface when it comes to preparing my family for an emergency. 72-hr kits, emergency supplies, disaster plans, copies of important documents, car kits, food storage...the list goes on and on. But I'll keep working away at it--baby steps are better then no steps!

"...if ye are prepared ye shall not fear"
D&C 38:30
Helpful Resources
Prepared LDS Family: This site is amazing and very helpful! Read it, and you'll be inspired to do something to prepare your family!
If ye are prepared ye shall not fear: This thought-provoking site explores issues of preparedness for the coming hard times.
Team Freeman: Project Prepared Part 3: A real-life example of a 72-hr kit.
Ready.gov: Prepare. Plan. Stay Informed.

Monday, July 13, 2009

The words we say

1 comments
"We must be so careful in speaking to a child. What we say or don’t say, how we say it and when is so very, very important in shaping a child’s view of himself or herself. But it is even more important in shaping that child’s faith in us and their faith in God. Be constructive in your comments to a child—always. Never tell them, even in whimsy, that they are fat or dumb or lazy or homely. You would never do that maliciously, but they remember and may struggle for years trying to forget—and to forgive. And try not to compare your children, even if you think you are skillful at it. You may say most positively that “Susan is pretty and Sandra is bright,” but all Susan will remember is that she isn’t bright and Sandra that she isn’t pretty. Praise each child individually for what that child is, and help him or her escape our culture’s obsession with comparing, competing, and never feeling we are “enough.”"

"I have often thought that Nephi’s being bound with cords and beaten by rods must have been more tolerable to him than listening to Laman and Lemuel’s constant murmuring. Surely he must have said at least once, “Hit me one more time. I can still hear you.” Yes, life has its problems, and yes, there are negative things to face, but please accept one of Elder Holland’s maxims for living—no misfortune is so bad that whining about it won’t make it worse.

"Paul put it candidly, but very hopefully. He said to all of us: “Let no corrupt communication proceed out of your mouth, but [only] that which is good … [and] edifying, that it may minister grace unto the hearers. And grieve not the holy Spirit of God. …Let all bitterness, and wrath, and anger, and clamour, and evil speaking, be put away from you. …And be ye kind one to another, tenderhearted, forgiving one another, even as God for Christ’s sake hath forgiven you” (Ephesians 4:29-32).

"Our words, like our deeds, should be filled with faith and hope and charity, the three great Christian imperatives so desperately needed in the world today. With such words, spoken under the influence of the Spirit, tears can be dried, hearts can be healed, lives can be elevated, hope can return, confidence can prevail."

Jeffrey R. Holland, “The Tongue of Angels,” Ensign, May 2007, 16–18

Thursday, July 9, 2009

Prepared Mama: Food Packs for 72-hr Kits

6 comments
A few weeks ago for Family Home Evening we pulled out our 72-hr emergency kits. I was a little chagrined by what I found. Our packs had been last updated in November of 2006. That means our food was two and half years old--yuck! And we only had two kits--for our family of four. Not so good.

So we got to work.

We thought it important to focus first on our food packs. I pulled out my sizable file of preparedness information I've collected over the years and did some research. These two blog posts were also very helpful:
Prepared LDS Family: 72-hr kits food packs
Team Freeman: Project Prepared Part 3

Keeping their suggestions in mind I made my shopping list. I did some price comparisons and ended up doing most of my shopping at Sam's Club, picking up a few things that were on sale at my local grocery store.

This is what we came up with for a one day menu.
Kellogg's Pop tarts (twin) 4 oz.,
Chef Boyardee Ravioli, or other 7.5 oz.,
Maruchan Ramen Noodle Soup, 3 oz.,
2 MM Fruit Snacks 1.8 oz.
Del Monte Fruit cup 4 oz. can,.
2 Quaker Granola bar .84 oz,
2 Peanut Butter crackers, 1 oz.
Plastic spoon
Gallon size Ziploc bag
napkin

*Note: This is the amount for one day. It doesn't look like much. Some sites recommend more food than this, but this is what we are comfortable with right now, keeping in mind portability and our budget. I would like to add some PowerBar Protein bars soon but I'm waiting for a good deal to buy them. The gallon size Ziploc bag serves as the holding container for each day's contents.

To keep things simple I kept the same menu for each day, for each member of our family. So multiply the above list by 3 and you'll have enough for one person's 72 hr (3-day) pack.

We then spent another Family Home Evening assembling the packs for our entire family. The 4-year old Ant Bug was very excited about helping with this activity, but the 20-month old Sweet Bee mostly just wanted to eat the fruit snacks.

The first step is to label each Ziploc bag. I used sticky labels and wrote "Day One-K", "Day Two-K" and "Day Three-K", repeating this with their initials for each member of my family. Using the Ziploc bag helps keep things organized; it's waterproof and it can also double as a trash bag.
Here is our food pile.
With all of our food gathered we then went around the table and filled up our bags.

A finished bag.
Water
Not included in the above menu is water. The recommendation is that you have 1 gallon of water per person per day. Obviously we can't carry that in our packs, so I just stuck 3-16.9 fl oz water bottles in each pack.

The Plan
I don't want to end up with two year old fruit cups and granola bars in our kits again. So our plan is to pull out our kits every six months and change out the food that is nearing expiration. The easiest way to remember to do this is to coincide it with General Conference sessions. It happens twice a year and you won't forget it! I've heard of this idea from many sources, so come October I'll be pulling out our kits again.

My next step is to finish putting together the personal supplies for our kits. How are you doing when it comes to emergency preparedness? Please leave a comment with your tips!

Helpful Resources
Prepared LDS Family: This site is amazing and very helpful! Read it, and you'll be inspired to do something to prepare your family!
If ye are prepared ye shall not fear: This thought-provoking site explores issues of preparedness for the coming hard times.
Team Freeman: Project Prepared Part 3: A real-life example of a 72-hr kit.
Ready.gov: Prepare. Plan. Stay Informed.

Tuesday, July 7, 2009

Nurture Mama turns a year old!

3 comments
Nurture Mama has reached another milestone. This blog is one year old today!

Would you like to read how it all began? Read my very first post here and see why I do what I do.

When I reached my 100th post I asked for your help in creating a list of the 100 things that mothers do.
With your help we've listed 75 words in a mother's job description ! But I'm sure there are more. Feel free to send me your one-word inspiration in answer to the question: A mother's job is to...
Mothering brings me a lot of adventures and a lot of sweet moments. Thanks for reading and letting me share my moments with you!

Monday, July 6, 2009

"The joy of motherhood comes in moments."

1 comments
"We need to remember that the full commitment of motherhood and of putting children first can be difficult...There are moments of great joy and incredible fulfillment, but there are also moments of a sense of inadequacy, monotony, and frustration. Mothers may feel they receive little or no appreciation for the choice they have made. Sometimes even husbands seem to have no idea of the demands upon their wives.

As a Church, we have enormous respect and gratitude to you mothers of young children. We want you to be happy and successful in your families and to have the validation and support you need and deserve."

Elder Ballard goes on to ask (and answer):
"
What can you do, as a young mother, to reduce the pressure and enjoy your family more?

"First, recognize that the joy of motherhood comes in moments. There will be hard times and frustrating times. But amid the challenges, there are shining moments of joy and satisfaction.

Author Anna Quindlen reminds us not to rush past the fleeting moments. She said: “The biggest mistake I made [as a parent] is the one that most of us make. … I did not live in the moment enough. This is particularly clear now that the moment is gone, captured only in photographs. There is one picture of [my three children] sitting in the grass on a quilt in the shadow of the swing set on a summer day, ages six, four, and one. And I wish I could remember what we ate, and what we talked about, and how they sounded, and how they looked when they slept that night. I wish I had not been in such a hurry to get on to the next thing: dinner, bath, book, bed. I wish I had treasured the doing a little more and the getting it done a little less” (Loud and Clear [2004], 10–11)."

M. Russell Ballard, “Daughters of God,” Ensign, May 2008, 108–10

Wednesday, July 1, 2009

Flags and Fireworks

0 comments
With two important patriotic holidays to celebrate this week, we spent an afternoon making flags.
As suggested on No Time For Flashcards, we used a white paper towel for the base. Add the red paper stripes and trim to size.

Cut a square of blue paper. I drew the yellow stars and the Ant Bug colored them in. Then just glue it all together.
The Canadian flag is a little simpler, as long as you use a maple leaf template. Make sure you sing O Canada while you cut!
After all of this flag making, the Ant Bug was inspired to design a flag for her very own country.
The Fourth of July is not complete without fireworks, so we tried our hand at making these paper fireworks.
We used black construction paper for the sky and white paper cut in a circle. Decorate the circles, fold them up and cut slits before gluing them on to the sky. We also added a few star stickers to make our night sky more authentic.

Check out these great books to learn more about the USA.

How to Make a Cherry Pie and See the USA by Marjorie Priceman

F is for Flag by Wendy Cheyette Lewison

Looking for more ideas for Independence Day? Check out these posts:

Americana Crafty Round Up on Make and Takes
Red, White and Blueberry Skewers on Make and Takes
Red, White and Yummy on No Time for Flashcards
 

Nurture Mama Copyright 2008 All Rights Reserved Baby Blog Designed by Ipiet | All Image Presented by Tadpole's Notez